How to Convert Image to PES for Embroidery Files That Stitch Perfectly
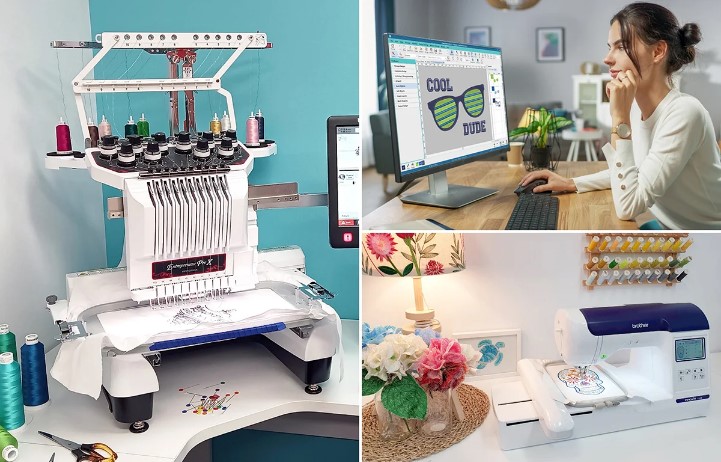
Embroidery is more than putting thread on fabric. Every great design starts with the right file. If you try to stitch a normal image, your embroidery machine will not know what to do. That is why you need a PES file. It tells the machine where to stitch, what path to follow, and how each part of the design should look.
If you want to Convert Image to PES for Embroidery, you need more than a file converter. You need proper embroidery digitizing. This process changes your artwork into stitch data that your machine can read. When done the right way, the design looks neat, smooth, and clean. When done the wrong way, you may see broken stitches, thread breaks, or poor results.
In this guide, you will learn how the process works, why digitizing matters, and how to get embroidery files that stitch well every time. Whether you are a hobby user or run a business, these tips will help you get better embroidery results.
What Is a PES File?
A PES file is an embroidery file format used by many Brother and Baby Lock embroidery machines. It stores stitch data instead of picture data.
Unlike a JPG or PNG image, a PES file tells the machine:
- Where each stitch starts
- Where each stitch ends
- Which stitch type to use
- The stitch order
- Color changes
- Thread paths
Without this data, the machine cannot create your design.
Why You Cannot Stitch an Image Directly
Many people think they can upload a picture to an embroidery machine and start stitching. Sadly, it does not work that way.
A normal image only stores colors and pixels. It has no stitch details. An embroidery machine cannot read pixels. It only understands embroidery commands.
That is why every image must go through the digitizing process first.
Think of it this way.
A photo is like a drawing on paper.
A PES file is like a map that tells the machine exactly where to sew.
What Is Embroidery Digitizing?
Embroidery digitizing is the process of turning artwork into an embroidery file.
This is not an automatic task. A skilled digitizer decides how the design should stitch. They choose the stitch types, stitch angles, stitch direction, density, pull compensation, and sequence.
These choices help the design sew smoothly without gaps or puckering.
Good digitizing creates:
- Clean outlines
- Smooth fills
- Sharp lettering
- Less thread breaks
- Better fabric coverage
Poor digitizing often leads to wasted thread and damaged fabric.
How the Image Conversion Process Works
The process includes several important steps.
Step 1: Choose a Good Image
Start with a clear image.
The better your artwork, the better the embroidery result.
A good image should have:
- Sharp edges
- High quality
- Clear colors
- Simple details
Avoid blurry or very small pictures.
Step 2: Clean the Artwork
Before digitizing starts, the artwork is cleaned.
This may include:
- Removing extra objects
- Fixing rough edges
- Improving shapes
- Making lines smoother
Simple artwork usually gives the best embroidery results.
Step 3: Plan the Stitch Types
Different parts of the design need different stitches.
Common stitch types include:
Satin Stitch
This stitch works well for:
- Text
- Borders
- Small shapes
It creates a smooth and shiny finish.
Fill Stitch
This stitch covers large areas.
It fills wide shapes with even stitching.
Running Stitch
This stitch is used for:
- Fine details
- Thin outlines
- Small lines
Each stitch type has a special job.
Step 4: Set the Stitch Order
The stitch order matters.
A skilled digitizer plans the sequence carefully.
The machine should stitch from the center outward whenever possible.
This helps reduce movement and keeps the fabric stable.
A good stitch path also cuts down on jump stitches.
Step 5: Test the Design
Testing is one of the most important parts.
Even a perfect-looking design on the screen may not stitch well.
A test sew shows:
- Thread breaks
- Gaps
- Loose stitches
- Poor alignment
- Fabric pull
Any problems can then be fixed before the final file is delivered.
Why Auto Conversion Often Fails
Many websites promise instant image conversion.
Most of these tools simply guess where stitches should go.
They cannot understand:
- Fabric type
- Stitch direction
- Underlay
- Density
- Pull compensation
Because of this, auto-generated files often produce poor embroidery.
Manual digitizing gives much better results.
Common Problems During Image Conversion
Many beginners face the same issues.
Here are some common problems.
Too Many Small Details
Embroidery cannot copy every tiny detail from a photo.
Small details may disappear after stitching.
A digitizer simplifies the artwork while keeping its overall look.
Tiny Text
Very small letters are hard to stitch.
Sometimes the text must be made larger.
Other times a different font works better.
Thin Lines
Very thin lines may not sew correctly.
They are often replaced with running stitches or slightly thicker shapes.
Large Filled Areas
Large fill areas need the right stitch direction.
Otherwise, the fabric may wrinkle or pull.
Good planning helps avoid this problem.
Tips for Better Embroidery Results
Good embroidery starts before the machine begins sewing.
Here are some useful tips.
Use High-Quality Artwork
Always begin with the clearest image you have.
Vector artwork usually works best.
High-resolution PNG files are also good.
Pick the Right Fabric
Different fabrics behave differently.
For example:
- Cotton is stable.
- Denim is strong.
- Stretch fabric moves more.
Each fabric may need different digitizing settings.
Use Good Stabilizer
A stabilizer keeps fabric from moving.
Without one, even a good PES file may stitch badly.
Choose the stabilizer based on your fabric type.
Match the Needle and Thread
Always use quality embroidery thread.
Use the correct needle size for your fabric.
This helps prevent thread breaks.
Run a Test Stitch
Never skip testing.
A sample stitch can save time, thread, and fabric.
Even professionals test new designs before production.
Why Manual Digitizing Gives Better Results
Manual digitizing is based on experience.
The digitizer studies the design before creating stitches.
Every shape gets the right stitch type.
Every section follows the best sewing path.
This creates:
- Cleaner embroidery
- Better texture
- Fewer trims
- Less thread waste
- Stronger finished designs
That is why experienced embroidery shops prefer manual digitizing over automatic conversion.
Choosing the Right Digitizing Service
Not every service gives the same quality.
Before placing an order, check a few important things.
Experience
Look for a team with years of embroidery knowledge.
Experience helps avoid costly mistakes.
Quality Control
Every file should be reviewed before delivery.
Many trusted companies also test stitch designs.
Fast Turnaround
Businesses often need files quickly.
Choose a service that delivers on time without lowering quality.
Customer Support
Good support makes the process easy.
You should be able to ask questions and request edits if needed.
Why Many Businesses Trust Professional Digitizers
Professional embroidery saves both time and money.
A properly digitized PES file reduces machine stops.
It also lowers thread waste.
Better files mean:
- Faster production
- Cleaner stitching
- Happy customers
- Fewer mistakes
This is why many embroidery shops work with professional digitizers instead of relying on automatic software.
How Digitizing Buddy Helps
At Digitizing Buddy, every embroidery file is prepared with careful attention to detail. The goal is not just to create a PES file but to produce a design that stitches smoothly on real embroidery machines.
Each design is checked for stitch quality, clean paths, proper density, and balanced stitch direction. This helps reduce thread breaks and gives a professional finish on many fabric types.
Whether you need a business logo, cap design, jacket back, or custom artwork, Digitizing Buddy focuses on creating embroidery-ready files that deliver reliable results.
Final Thoughts
Turning an image into a PES embroidery file is much more than changing one file type into another. It is a careful process that requires planning, skill, and testing. Every stitch matters. From choosing the right stitch type to setting the correct sewing order, each step plays a role in the final result.
When the digitizing is done well, your embroidery looks clean, neat, and professional. Your machine runs more smoothly, and you spend less time fixing problems. That is why working with experienced professionals is always a smart choice.
If you want embroidery files that stitch cleanly from the first run, trust a skilled team like Digitizing Buddy to create machine-ready designs that deliver consistent and high-quality embroidery every time.

About Premium Author
This post has been authored and published by one of our premium contributors, who are experts in their fields. They bring high-quality, well-researched content that adds significant value to our platform.
Popular Categories
Stay Connected
Recent Posts